Add and invite team members on a Free BIMcollab space
This article describes how to add team members to your project in a Free Space.
Project leaders can add someone to a project with these easy steps:
b. Log in to the newly created space.
c. Add your colleagues as users to the space so you can start testing the BIM collaboration. You can also add users to the space by importing a CSV file. (1)(2)(3)

In Free Space, you can add an unlimited nr. of users to an unlimited nr. of project to make use of the Free Model WebViewer.
d. On the 'My Projects' page select the project you wish to add team members to ( or create a new project if there is none).
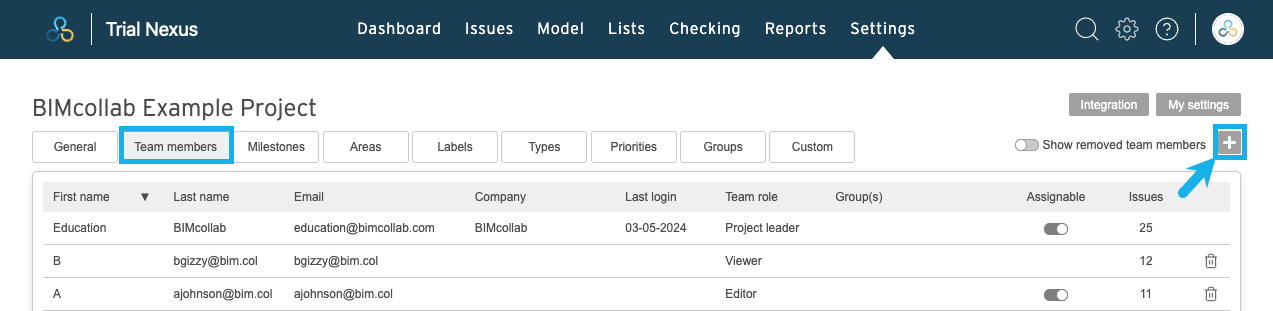
e. Select the 'Settings' page in the project.

e. Click on the 'Add team member' button
f. Type the email address of the person you want to invite, to find them from the list of users on the space. Select the team member role, give them the rights they would need and then click on 'add'.
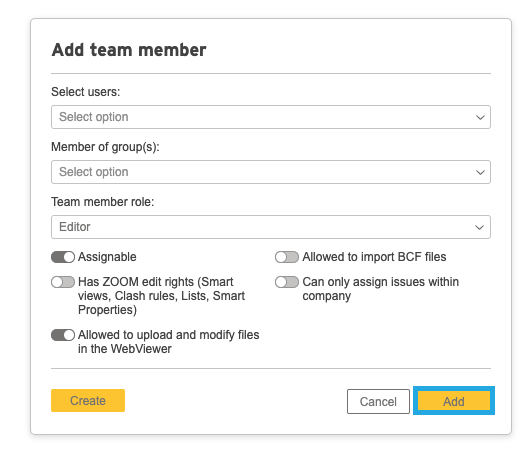
g. You could not find the users from the list? Then that email address has not been added to the space yet. Click on "create" to add users to the space.

Team Members vs. Users
Team Members: People who work together on a specific project.
Users: All the people in the space who may be working on various projects.
i. The user will be notified by email that he became a team member of the project. He will see the project on his 'My Projects' page.

When assigning a new team member a role, it is important that you are aware of the privileges and limitation that each role brings: For more information about roles see Roles within the BIMcollab environment.
Related Articles
Add and invite team members in a space
This article describes how to add team members to projects in a private BIMcollab Nexus space. To know how to add team members to your free project in your Nexus Trial space, consult the article Add and invite team members to a Nexus Trial space. Do ...Add a new user
Before a user can be added to a project in a BIMcollab space as a team member, they first need to be added to the space as a new user. By default only space administrators can add new users to the space. However, administrators can give users the ...Migrate projects from join.bimcollab.com to a private space
This article is relevant for you if you want to transition from a Join space to a private space and start your commercial projects. BIMcollab Nexus doesn't support moving projects from join.bimcollab.com to a private space, or from one private space ...Model tab in a BIMcollab Space
A BIMcollab space is a platform that offers an array of online model viewing features, allowing users to seamlessly navigate through intricate models, analyze properties, and address issues efficiently. In this article, we will delve into the three ...Limit team members from being assigned to issues
A project leader can switch the option ‘Assignable’ on or off for each team member individually. This can be done by clicking on a team member on the Settings page of the project and enable the option 'Assignable' in the 'Edit team member' window. In ...