Create a JSON script for Zoom Nightshift
Zoom Nightshift automates actions in Zoom using JSON script files in combination with the Windows Task Scheduler.
With Nightshift, you can automate the following actions in BIMcollab Zoom:
- Open models / Add to project
- Connect to project
- Filter issues
- Update issues
- Run and share all Lists
- Synchronize project
In this article we describe how to create a script to be run in Zoom Nightshift.
For more information about how to set up a task in Windows Task Scheduler, consult the article Configure a task for Zoom Nightshift in the Windows Task Scheduler.

A JSON script can be set up in any JSON script editor.
You can find an example script as an attachment to this article, to get you started.
The script starts with the title of the script and optionally the version, followed by the actions to be performed in BIMcollab Zoom when the script is executed.
{"title": "Example_Script",
"version": "0.1","actions": [
The different actions that can be added to the script, for BIMcollab Zoom to perform during Nightshift, are explained in the rest of this article.
Open models / Add to project
The first thing you want to do in Nightshift, is open a set of models on which the rest of the actions can be performed. For this, there are two different possible prompts:
- OPEN_MODELS: adds and loads a model to the Navigator and closes any previously loaded models
- ADD_TO_PROJECT: adds and loads a model to the Navigator without closing models that are already present in the Navigator
Note: when you connect to a project where a Project folder is active, all the models in the project folder will be automatically loaded, regardless of their loadstatus in your Zoom project. There is no additional input in the script necessary to open these models.
If you want to add additional models to the project which are not located in the project folder, use the ADD_TO_PROJECT prompt.
If you want to add additional models to the project which are not located in the project folder, use the ADD_TO_PROJECT prompt.
Script
{
"type": "OPEN_MODELS",
"models": [
"C:/Users/userone/Desktop/1.ifc",
"C:/Users/userone/Desktop/2.ifc","C:/Users/userone/Desktop/3.bcp"
]
}
Explanation
Replace "C:/Users/userone/Desktop/1.ifc", etc. with the paths to the models you would like to open, divided by commas.

Always use forward slashes "/" in the path definition, not backslashes.
Connect to project
In order to perform an update of Smart Issues and share Lists, you need to be connected to a project on BIMcollab Nexus.
The prompt for this is CONNECT_TO_PROJECT
Script
{
"type": "CONNECT_TO_PROJECT",
"space_name": "example.bimcollab.com",
"project_name": "My BIMcollab project"}
Explanation
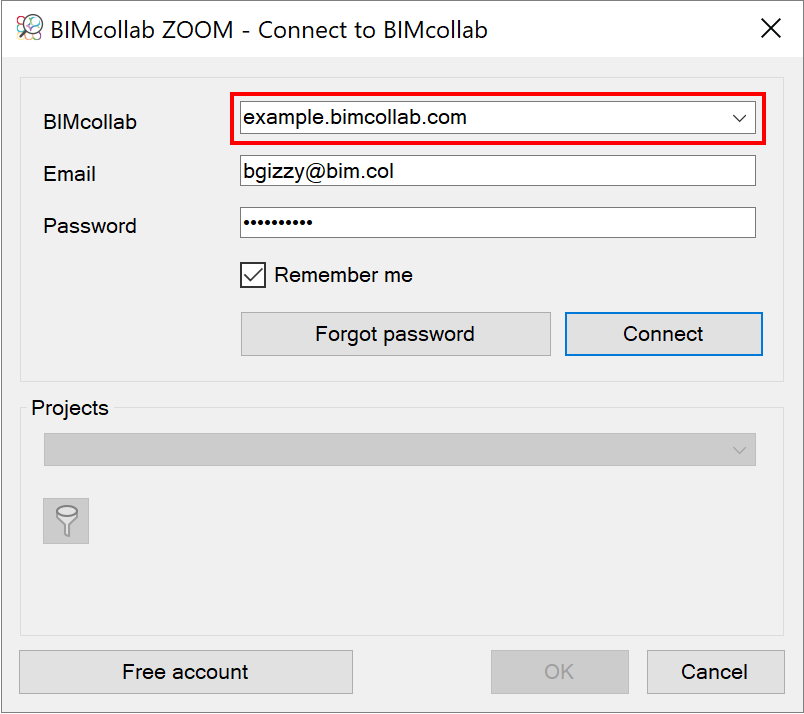
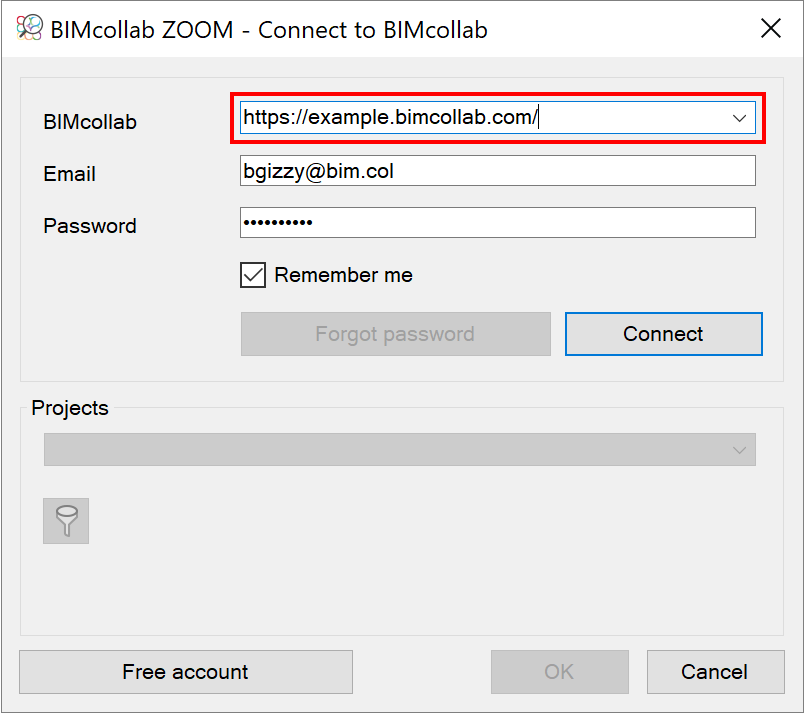
- Replace "example.bimcollab.com" with the URL of the space you want to connect to.
- Replace "My BIMcollab project" with the name of the project you want to connect to. Pay attention to the correct spelling of the name and the URL.
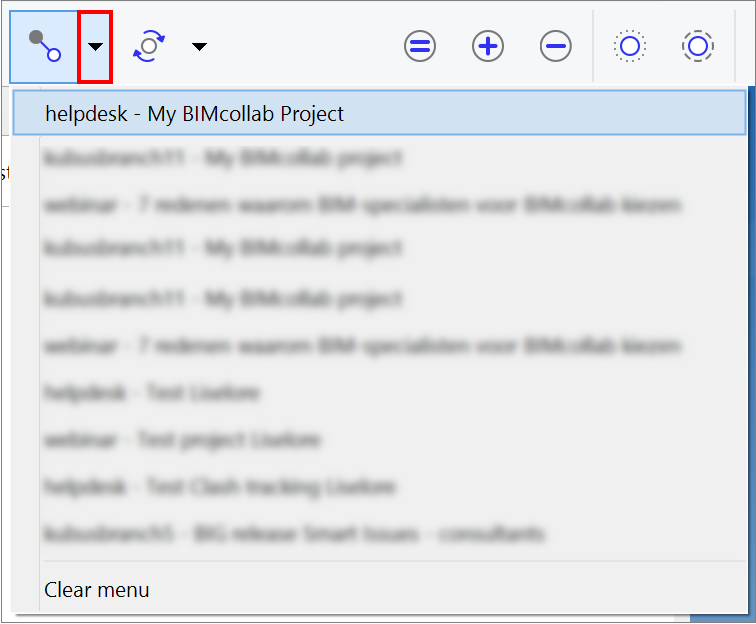
It is important to note that the project you want to connect to is part of the recent projects list in BIMcollab Zoom and that your credentials are saved in BIMcollab Zoom. This can be achieved by marking the checkbox 'Remember me' when manually connecting to the project.
Also make sure that the format of the "space_name" parameter precisely matches the format in which the space name was entered when connecting to the project.
Also make sure that the format of the "space_name" parameter precisely matches the format in which the space name was entered when connecting to the project.
If you for example entered https://example.bimcollab.com/ or example.bimcollab.com, this needs to be exactly matched in the script.
Filter issues
Once you are connected to a project, all issues that are visible for you in the project will be loaded in BIMcollab Zoom.
In the next step, any Smart Issues that are part of this list can be automatically updated. In order to only update a selection of issues of your choice, first set up the issue filter.
The prompt is FILTER_ISSUES.
If this prompt is omitted from the script, the last active filter will be used.
Script
{
"type": "FILTER_ISSUES",
"filter_type": "Issue",
"area": "Model",
"milestone": "Design phase",
"label": "Architecture",
"priority": "Normal",
"show_active": true,
"show_resolved": true,
"show_closed": false,
"hide_invisible": false,
"show_to_approve": false,
"assigned_to_user_email": "example@bimcollab.com",
"deadline": "01-01-2021",
"created_by_user_email": "example@bimcollab.com",
"custom1": "Value 1",
"custom2": "Value 2"
}
Explanation
Here are some things to take into account for this part of the script:
- When this prompt is added to the script, the issue filter in BIMcollab Zoom is first reset to the default filter, and then adjusted according to the values in the script.
- Nightshift assumes default parameter settings whenever possible, so you only need to specify changes that are made from the default settings. All of the parameter lines in this part of the script, except for "type": "FILTER_ISSUES", (mandatory action definition), and the "priority", may be omitted from the script. If for example the parameter "label" is omitted, Nightshift will keep that parameter setting at "All".
- Pay attention to the spelling of the entered values. They must be exactly the same as they are in the project.
-
 Tip: Open the Issue filter window in BIMcollab Zoom next to the JSON editor to avoid typos in the script.
All lines in this part of the script represent one of the properties in the issue filter:
- "filter_type"
Replace "Issue" with the type you want to filter. The default value is "All" (or the corresponding value in the language of your project). - "area"
Replace "Model" with the area you want to filter. The default value is "All" (or the corresponding value in the language of your project). - "milestone"
Replace "Design phase" with the milestone you want to filter. The default value is "All" (or the corresponding value in the language of your project). - "label"
Replace "Architecture" with the label you want to filter. The default value is "All" (or the corresponding value in the language of your project). - "priority"
Replace "Normal" with the priority you want to filter. The default value is "All" (or the corresponding value in the language of your project). - "show_active"
This is a checkbox determining whether the active issues of the project should be displayed. Enter 'true' if the checkbox should be enabled or 'false' if it should be disabled. The default value is true. - "show_resolved"
This is a checkbox determining whether the resolved issues of the project should be displayed. Enter 'true' if the checkbox should be enabled or 'false' if it should be disabled. The default value is true. - "show_closed"
This is a checkbox determining whether the closed issues of the project should be displayed. Enter 'true' if the checkbox should be enabled or 'false' if it should be disabled. The default value is false. - "hide_invisible"
This is a checkbox determining whether issues that are not visible for all team members should be hidden. Enter 'true' if the checkbox should be enabled or 'false' if it should be disabled. The default value is false. - "show_to_approve"
This is a checkbox determining whether the issues that you have to approve should be displayed. Enter 'true' if the checkbox should be enabled or 'false' if it should be disabled. The default value is false. - "assigned_to_user_email"
Replace "example@bimcollab.com" with the email address of the assigned user, not just their name. The default value is "" (issues assigned to all users are shown). - "deadline"
Replace "01-01-2021" with the deadline on which you want to filter, in the format dd-mm-yyyy. The default value is "" (no deadline is taken into account). - "created_by_user_email"
Replace "example@bimcollab.com" with the email address of the creator, not just their name. The default value is "" (issues created by all users are shown). - "custom1"
Replace "Value 1" with the value of Custom List field 1 you want to filter. The script line should always start with "custom1", not with the actual name of the Custom field. The default value is "" (All values for this custom field are shown). - "custom2"
Replace "Value 2" with the value of Custom List field 2 you want to filter. The script line should always start with "custom2", not with the actual name of the Custom field. The default value is "" (All values for this custom field are shown).
If one of the inputs of the filter is incorrect, the script will not be executed further.
Update issues
All Smart Issues that are visible in the Issues tab of BIMcollab Zoom can be automatically updated, according to the status of the clashes in the loaded models.
The prompt is UPDATE_ISSUES.
Script
{"type": "UPDATE_ISSUES",
"close_where_clashes_solved": true,
"reopen_previously_closed_issues": false,
"comment": "Updated with Nightshift"
}
Explanation
Every line in this part of the script represents one of the options in the 'Update Smart Issues' window. Note that 'Selected issues only' is not present, as no issues can be separately selected while running the script. The action will be performed on all visible issues in the issues tab.
- "close_where_clashes_solved"
This is a checkbox determining if issues where all clashes are solved can be closed with the update. Enter 'true' if the checkbox should be enabled or 'false' if it should be disabled - "reopen_previously_closed_issues"
This is a checkbox determining if closed issues which contain still active clashes, can be reopened with the update. Enter 'true' if the checkbox should be enabled or 'false' if it should be disabled - "comment"
Replace "Updated with Nightshift" with any comment you would like to add to the updated issues
If any of the options are missing, a default value will be added, as shown in the image below.
Run and share Lists
All Lists located in 'Shared' in the Lists tab can be run and shared at the same time so the most recent information is available for all team members in BIMcollab Nexus.
The prompt for this action is RUN_AND_SHARE_LISTS
Script
{
"type": "RUN_AND_SHARE_LISTS",
"list_set-name" : "List set 3"}
Explanation
The parameter "list_set_name" is optional. If you want to run a particular list set, replace "List set 3" with the name of the list set you want to run. If the parameter is not present, all Lists in 'Shared' will be run and shared.
Synchronize project
Once Issues are updated and Lists are run and shared, it is important to always synchronize the project to BIMcollab Nexus, so the changes are saved and visible for the rest of the team.
Always add this prompt to the end of the script.
The prompt is SYNCHRONIZE_PROJECT.
Script
{
"type": "SYNCHRONIZE_PROJECT"
}
Follow up on the status of the task
Once the task has run, you can check whether all actions were performed successfully in the Nightshift logfile. The file gives feedback about the execution status of all actions in the scripts, and error codes if something went wrong.
You can find all logfiles at C:\Users\\AppData\Roaming\KUBUS\BIMcollab Zoom\Nightshift.
Replace with the name of your own user profile in windows.
The AppData folder is a hidden folder by default. Display the hidden folders in the File Explorer to navigate to the correct location.
Related Articles
Configure a task for Zoom Nightshift in the Windows Task Scheduler
Zoom Nightshift reduces the time spent on clash management even further by performing repetitive tasks while you are away from your computer. It can automatically check new model versions, update Smart Issues and shared Lists to BIMcollab Nexus, so ...Create Smart Properties
Smart Properties in BIMcollab Zoom are user-defined properties, based on existing object attributes. They help you to reorganize and structure BIM data. When working with IFC files delivered by multiple authors, it is inevitable that they contain ...Create Smart Issues by reporting conflict results
Smart Issues in BIMcollab are issues that contain and track reported Conflicts from BIMcollab Zoom. In a traditional model checking workflow, conflicts are detected in a model validation tool and reported as issues. When new models are created, the ...BIMcollab Zoom login
While working in BIMcollab Zoom, you will notice that the application might request you to login on several occasions in order to proceed with your work. Although it could look repetitive, each login process has a clear objective and will depend on ...Why can’t others read the BCF files I create with BIMcollab Zoom?
All products in the BIMcollab ecosystem, including BIMcollab Zoom, support reading and writing BCF files in the 1.0, 2.0 and 2.1 formats. When exporting issues to BCF, please make sure that you select a version which is supported by the receiving ...