Toolbars in BIMcollab Model WebViewer

Read more about other features of the BIMcollab Model WebViewer from this article: Quick Start Guide BIMcollab Model WebViewer
In the main window of the BIMcollab Model WebViewer, you'll find essential tools for customizing your viewpoint while navigating and creating issues.
1. Constant toolbar : Always available below your WebViewer window, this toolbar offers quick access to essential Viewpoint customization tools such as Sections, Restoring Views, Hiding or Isolating Objects, and Measurements.
2. Contextual Toolbar: This toolbar adjusts its options dynamically based on your selections. Clicking on an object or section plane reveals relevant tools tailored to your current context.
1. Constant Toolbar
Sections
In BIM WebViewer, you have the flexibility to create up to six section planes and one section box, providing a comprehensive approach to model analysis.
Restore the default viewpoint
There are a few buttons on the bottom menu that can help you eliminate the viewpoint customizations. You can unhide all the hidden elements by clicking the show all icon  . Then if you have moved the view away from the model, you can always Zoom to fit with this icon
  . Lastly, you have the option to go back to the default view by clicking on the restore view icon
  which reverts back all types of adjustments. For instance, it unhides any hidden elements, applies Zoom to fit and removes any added colors or sections.
Measurements
There are two options that can be used in BIMcollab WebViewer to create measurements: Laser Measurement and Point to point measurement. To toggle between these, click the arrow to "Select Measurement type".
For a deeper understanding about the measurement features, refer to this article: Measurements In BIMcollab Model WebViewer
2. Contextual Toolbar
For objects
When you select an element, a range of options becomes available. You can hide, isolate, and even apply custom colors to these elements. Additionally, you have the capability to create a section box around the selected elements, providing a focused, in-depth view for analysis.
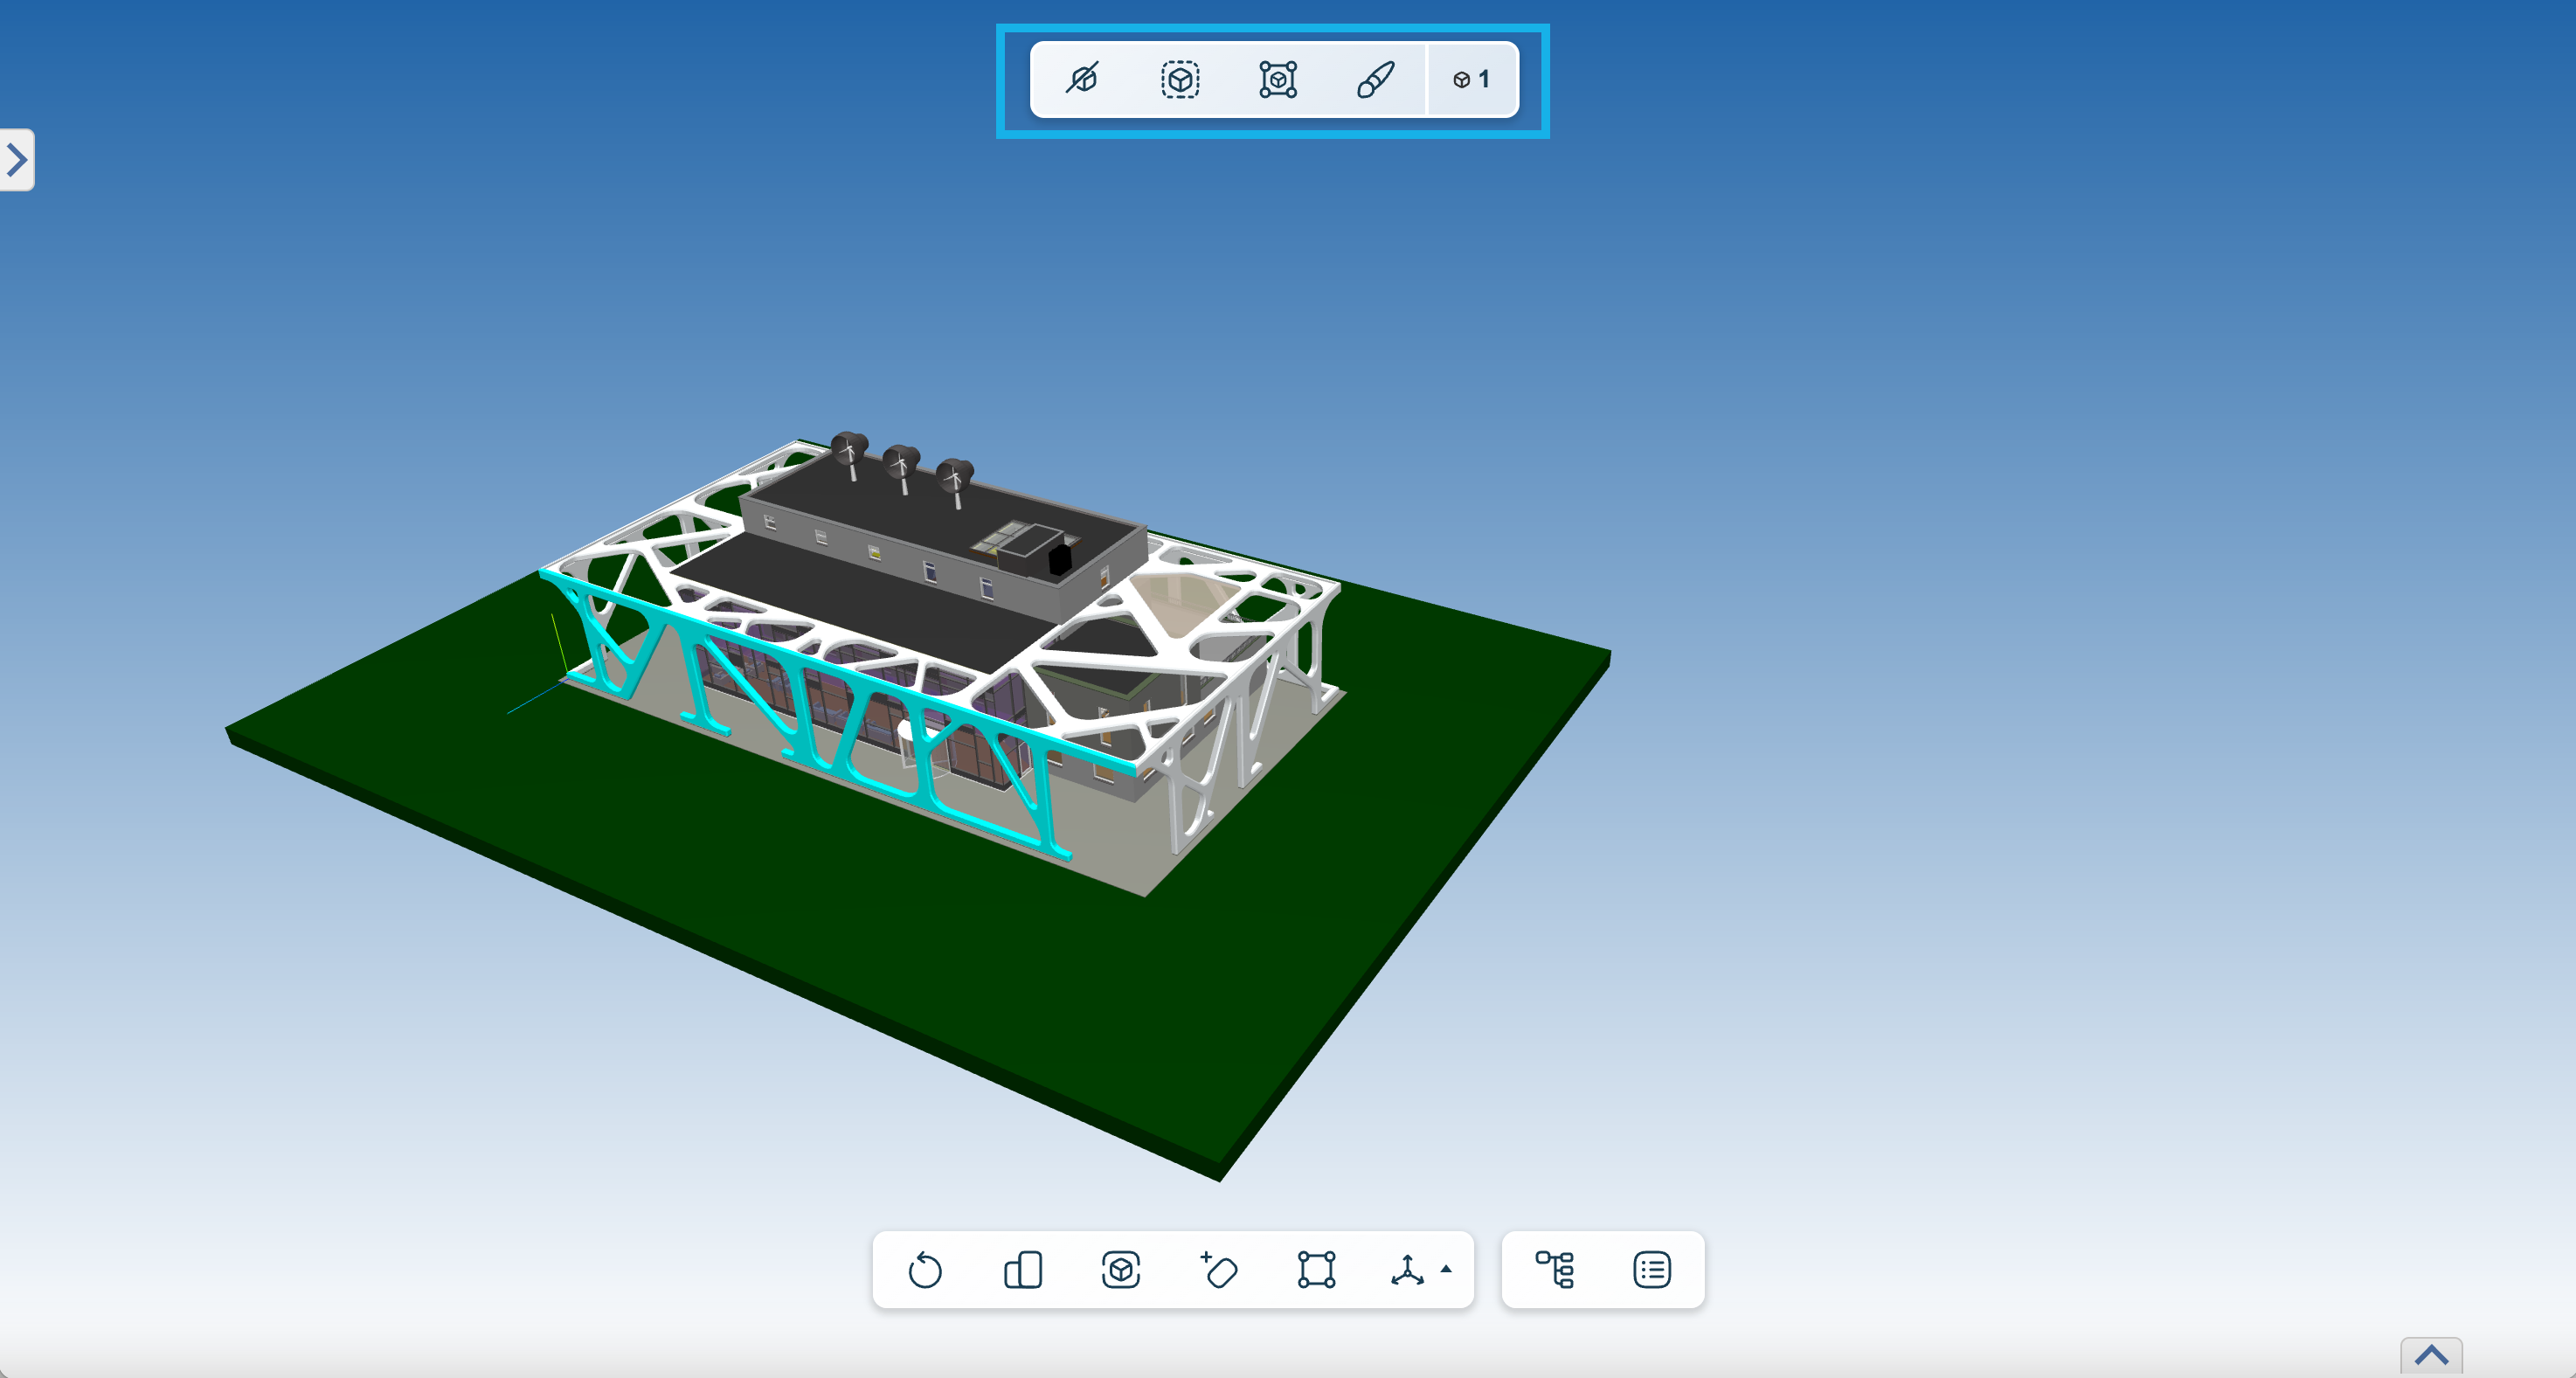
Instead of selecting elements one by one you can select a category of elements from the "Navigation panel> Objects" and apply the desired customizations. You can also keep the CTRL key and click on multiple objects, object categories or models to have them selected.
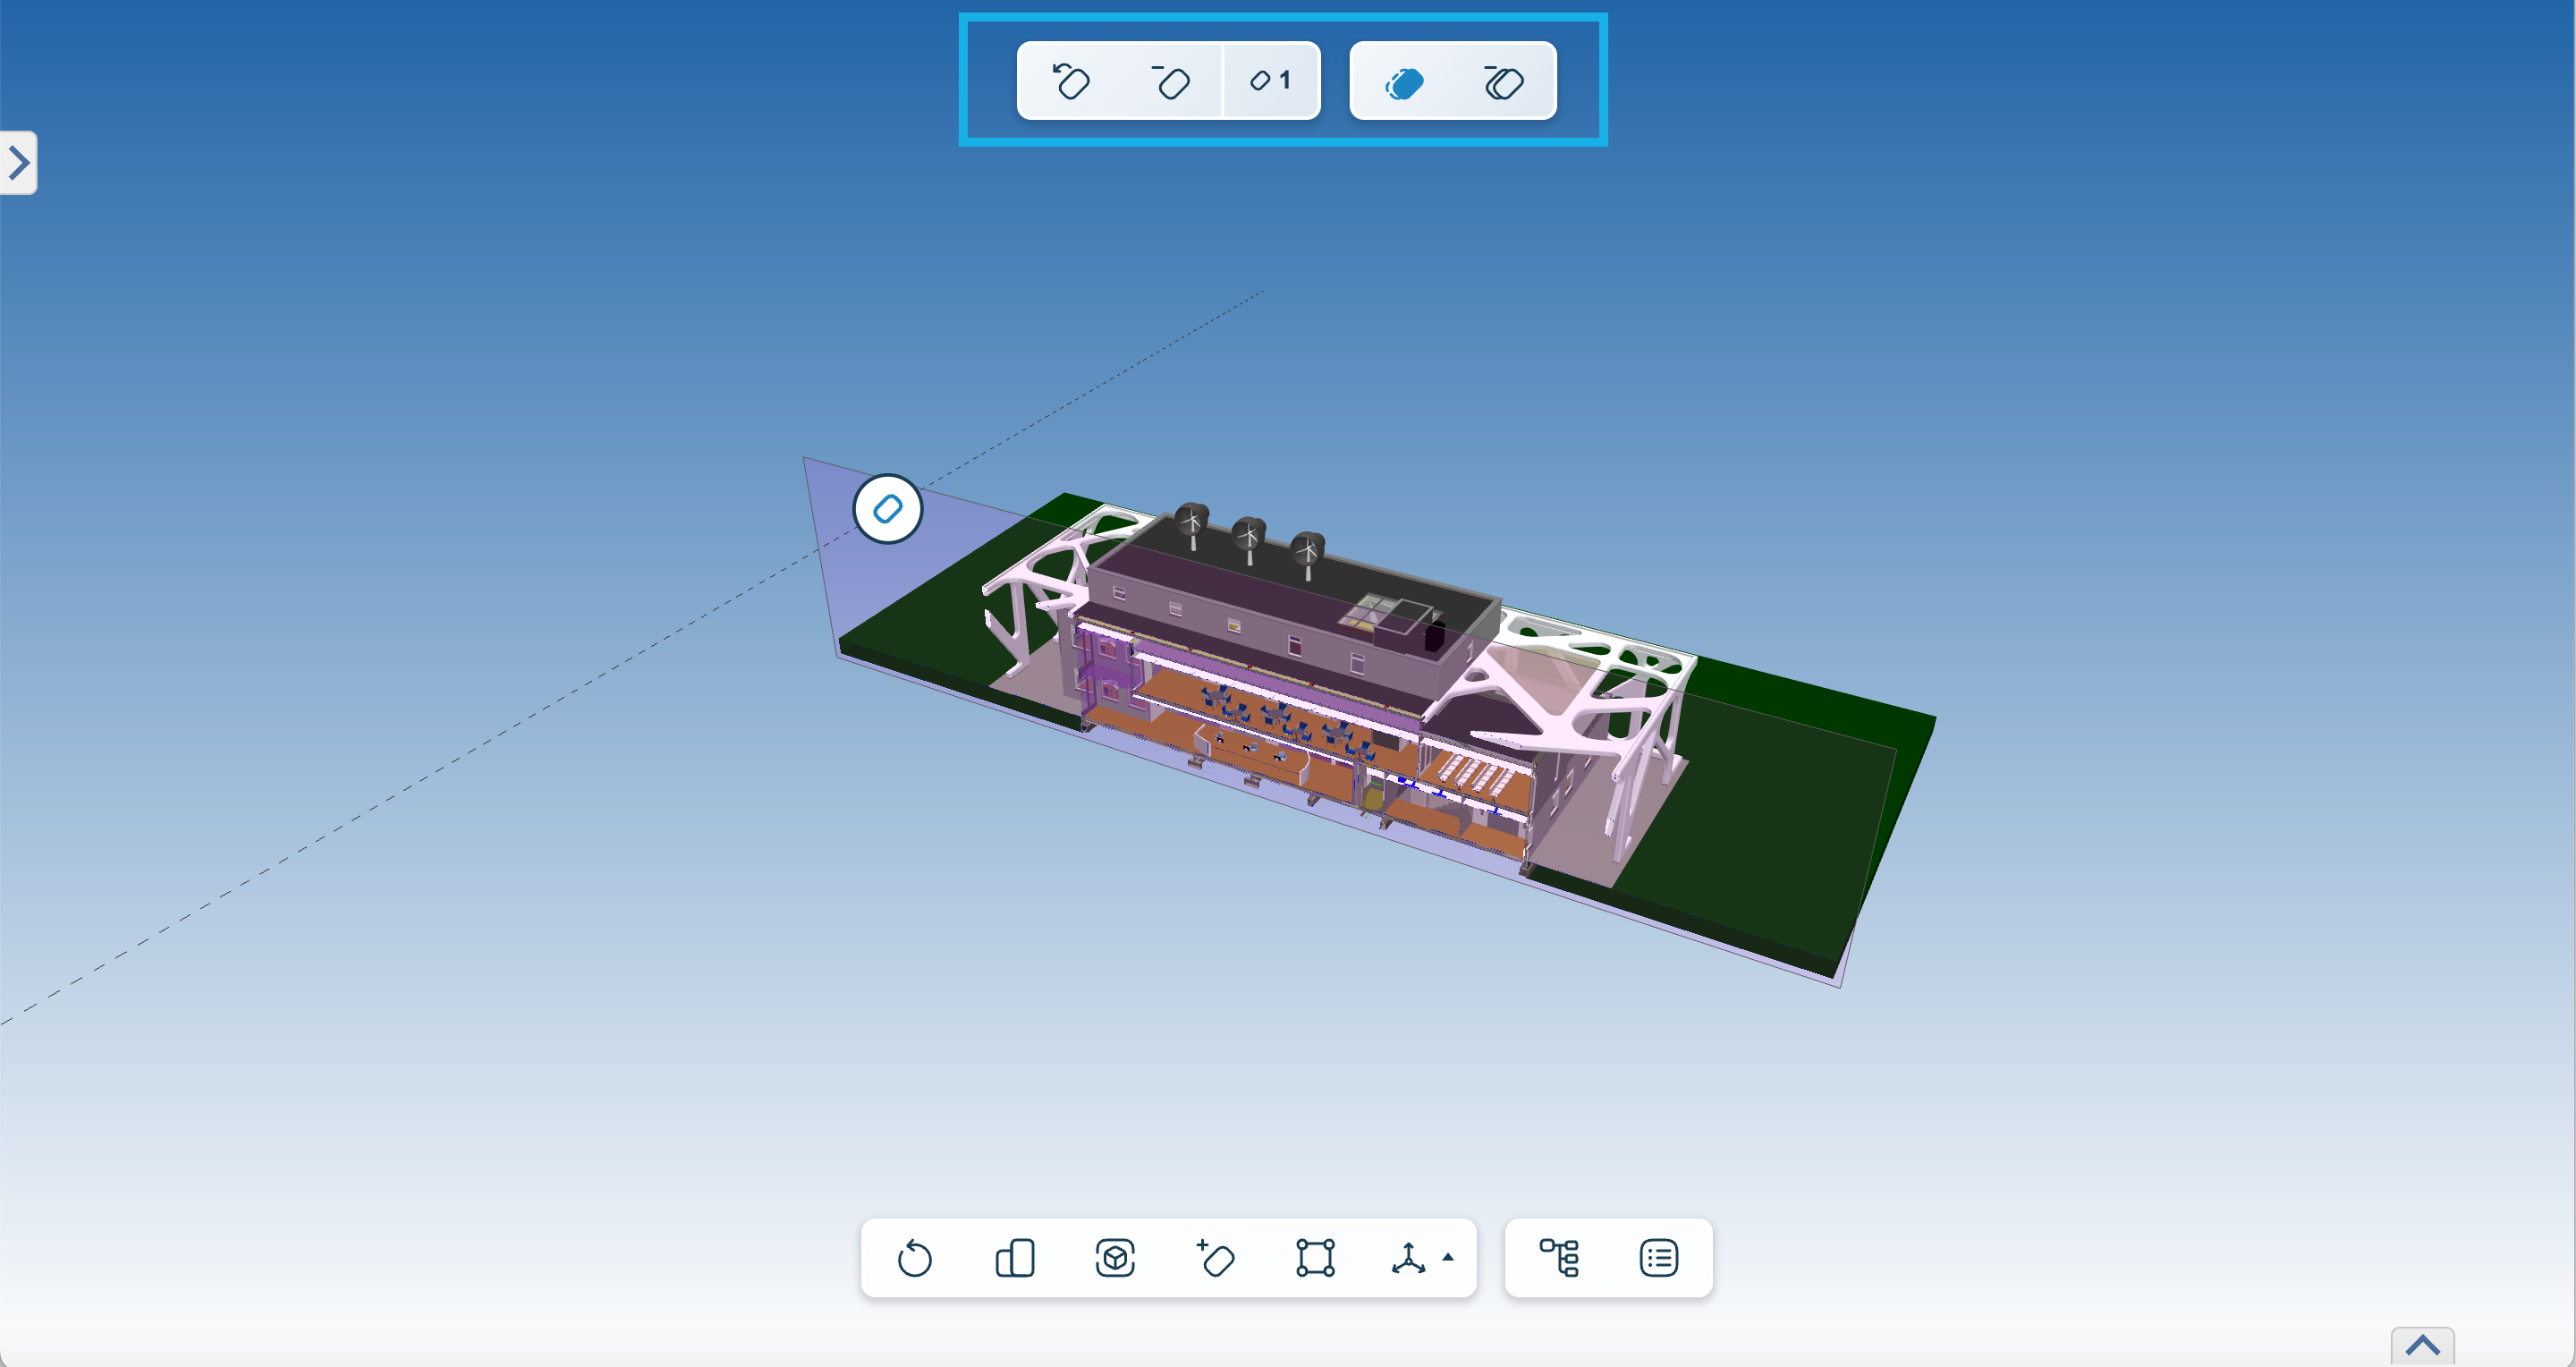
For sections
When a section plane is created and selected, the sectioning tool box appears on the top of the viewer, allowing you to apply more adjustments to this plane.
For measurements
When a measurement is created and selected, a tool box appears on the top of the viewer, allowing you to apply more adjustments to this measurement type.
Some actions you can perform from the control bar include:
Related Articles
Quick Start Guide BIMcollab Model WebViewer
BIMcollab Model WebViewer offers a streamlined way to view IFC models, their properties, and issues in one go. With this powerful tool, you can effortlessly navigate through intricate models while gaining insights into their properties and addressing ...Measurements In BIMcollab Model WebViewer
Read more about other features of the BIMcollab Model WebViewer from this article: Quick Start Guide BIMcollab Model WebViewer There are three options that can be used in the BIMcollab WebViewer to create measurements: (1) Point to point measurement, ...Using model tags in BIMcollab Model WebViewer
Read more about other features of the BIMcollab Model WebViewer from this article: Quick Start Guide BIMcollab Model WebViewer Model tags allow you to categorise your models in BIMcollab Model WebViewer based on the specific needs of your project. ...BIMcollab WebViewer is released
In the heart of the BIMcollab ecosystem lies the game-changing BIMcollab Model WebViewer—a robust tool engineered to improve your BIM collaboration experience. Seamlessly integrated into the BIMcollab Nexus and BIMcollab Twin platforms, this ...Model tab in a BIMcollab Space
A BIMcollab space is a platform that offers an array of online model viewing features, allowing users to seamlessly navigate through intricate models, analyze properties, and address issues efficiently. In this article, we will delve into the three ...